
시놀로지 클라우드플레어 와일드 카드 인증서 발급 (acme.sh 사용)
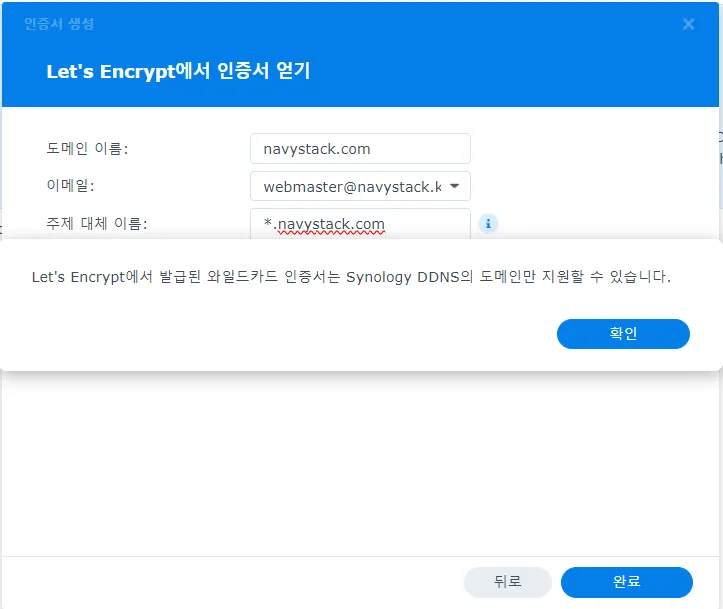
시놀로지에서 와일드카드 인증서는 시놀로지에서 기본적으로 제공하는 DDNS만 가능합니다.
이 과정을 따라 하게 되면 시놀로지의 클라우드 플레어 DDNS 기본 인증서를 acme에서 발급한 인증서로 대체하게 됩니다.
시놀로지의 인증서 훅을 사용하여 우리가 발급받은 인증서를 모든 설정에 적용할 수 있습니다.
1. 작성하게 된 계기
- 우선 시놀로지에서 아래처럼 개인이 소유한 도메인에 대해서는 와일드 카드 인증서를 지원하지 않습니다.
- 와일드카드 인증서를 발급하는 것을 꺼리시는 분도 있겠지만, 개인적으로 와일드 카드 인증서를 선호합니다. 언제든 일괄적으로 한 번에 revoke를 할 수 있기 때문입니다.
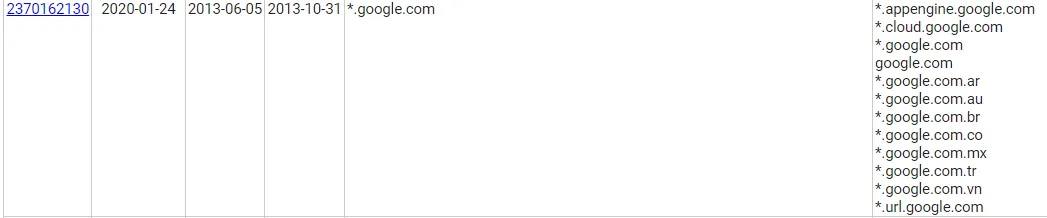
- 구글과 같은 대기업에서도 와일드 카드 인증서를 사용합니다.
- 또한 설정의 편의성도 있지만 인증서 투명성 리포트에 서브도메인이 기록이 되지 않아 무작위로 접속할 가능성을 줄여준다고 생각하기 때문입니다.
- 혹시 현재까지 발급받은 인증서의 모든 목록을 보시려면 crt.sh에서 검색해 보시기 바랍니다.
2. 필요조건
- 위의
1. SSH를 접속할 프로그램과2. WebUI에서 SSH를 활성화하셨다면 준비 완료입니다.
- 위의
1. SSH를 접속할 프로그램과2. WebUI에서 SSH를 활성화하셔야 합니다. - 외부 망으로 연결된 경우 공유기에서
포트포워딩을 해야 합니다. - 공유기 마다 설정이 다릅니다만, 큰 틀은 같습니다.
- 위의 사진과 같이 8887포트를 사용하셨다면 외부에서
8887로 들어오는 것을나스의ip:8887로 연결해 주시면 됩니다.
3. CMD로 SSH 프로그램 실행
- 가장 간단하게 CMD를 실행하는 방법은
Windows 키+R키를 누른 후에cmd를 입력하시고Enter키를 누르는 것입니다.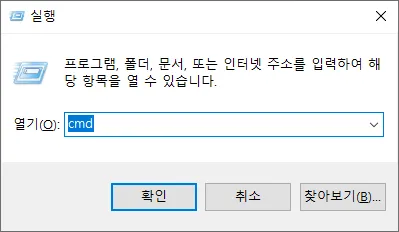
- 화면의 왼쪽 하단의 윈도우 이미지를
마우스 오른쪽 클릭하셔서Windows PowerShell을 클릭하셔도 됩니다.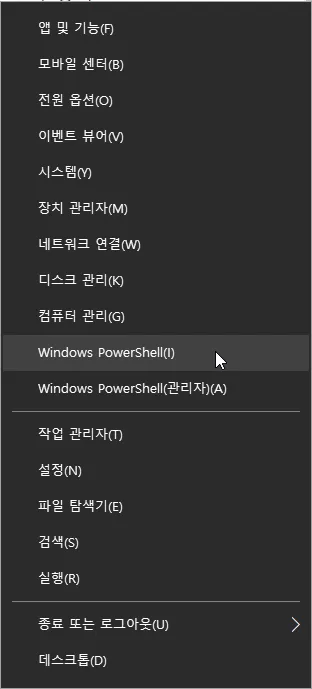
4. CMD로 SSH 접속
성공적으로 CMD (혹은 Windows PowerShell) 을 실행하셨다면 아래와 같이 검은 배경에 흰색 글씨가 나타납니다.
  Microsoft Windows [Version 10.0.19045.4046]  (c) Microsoft Corporation. All rights reserved.
  C:\Users\ino>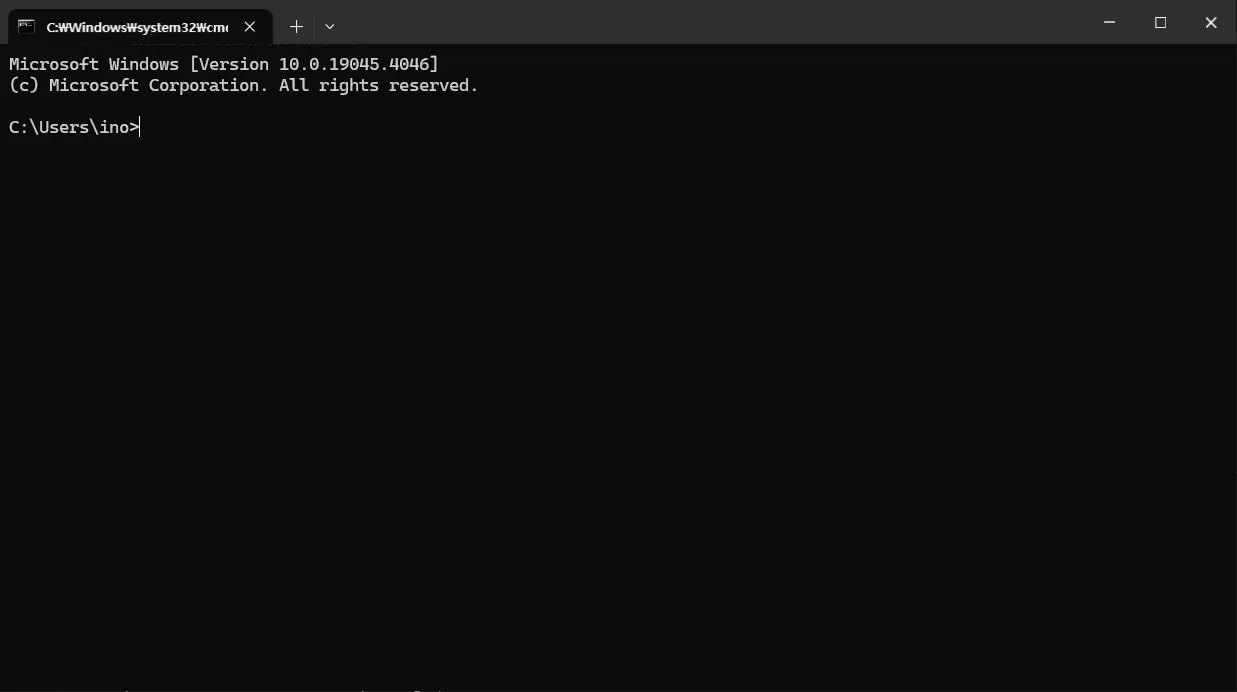
기본적으로 접속 문자열은 아래와 같습니다.
ssh '접속할-서버의-아이디'@'접속할-서버의-주소' -p '접속할 포트'ssh navystack@192.168.0.200 -p 8887- DNS를 사용하는 경우
ssh webmaster@navystack.com -p 8887- IP를 사용하는 경우
ssh webmaster@'공인아이피' -p 88874.1 접속 문자열
C:\Users\ino>ssh navystack@cloud.navystack.com -p 8887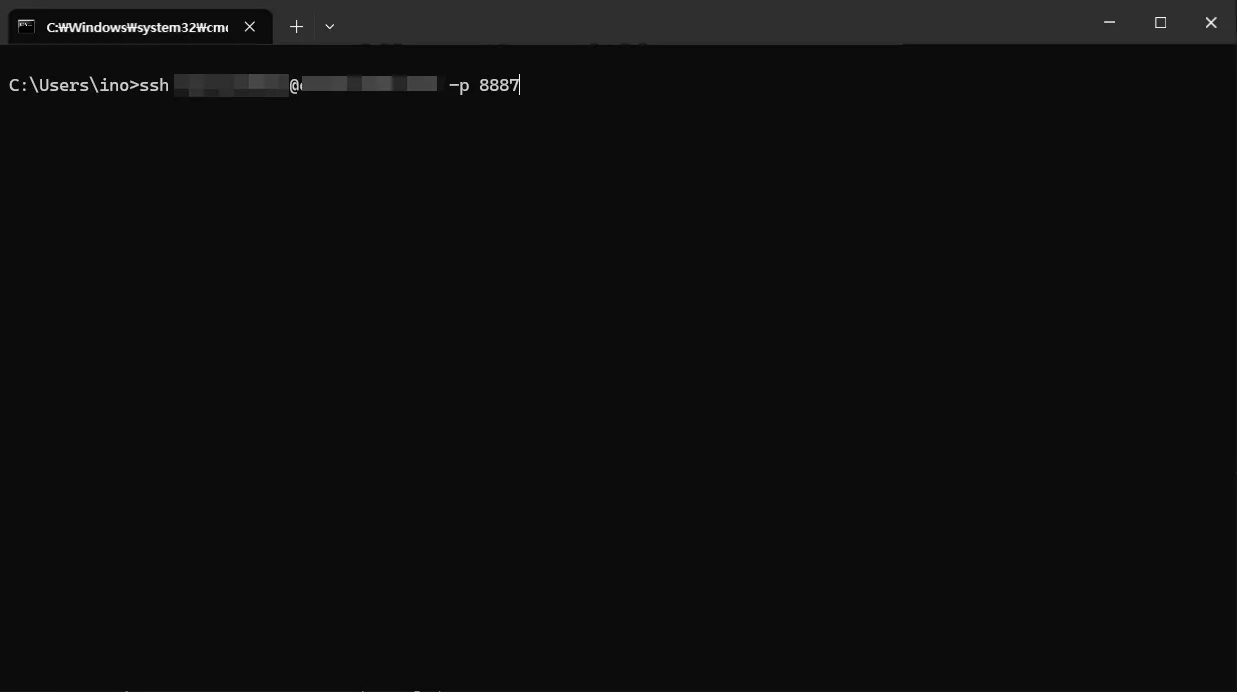
4.2 known_hosts에 등록 허가
C:\Users\ino>ssh navystack@cloud.navystack.com -p 8887 The authenticity of host '[cloud.navystack.com]:8887 ([192.168.0.200]:8887)' can't be established. ECDSA key fingerprint is SHA256:eAqvnXvCXJTTbbfewcqKSHTAgWf9jcgEBm6RIkPw77s. Are you sure you want to continue connecting (yes/no/[fingerprint])? yes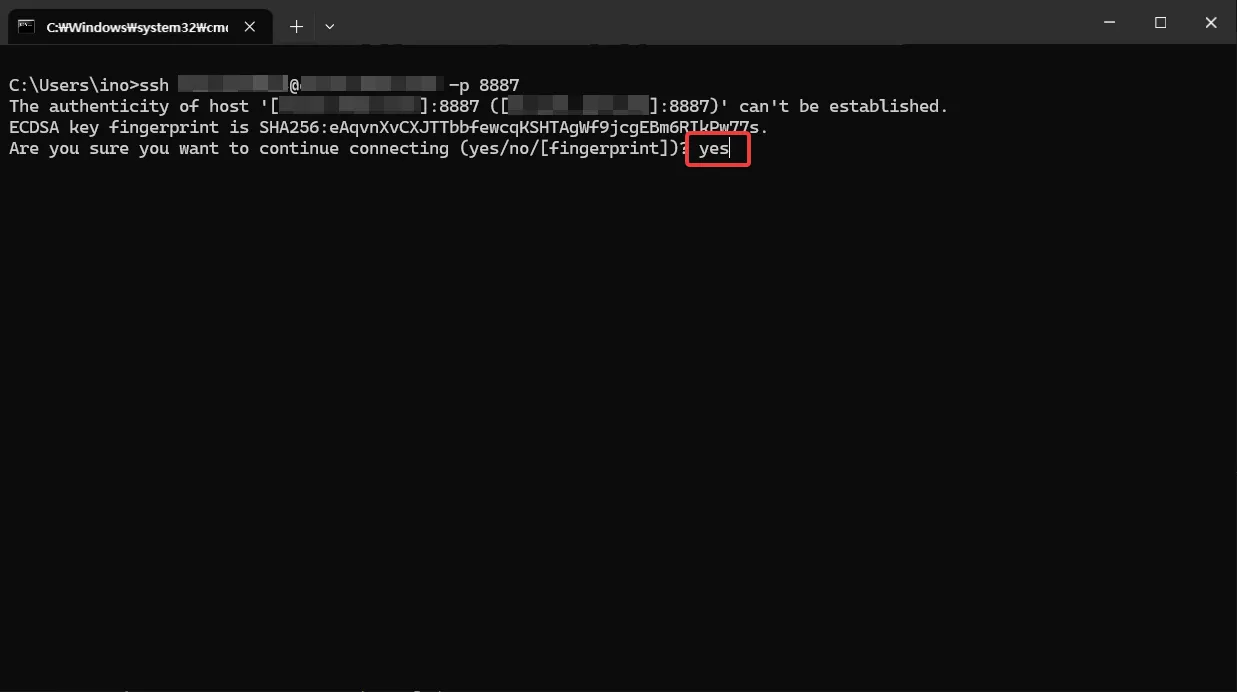
4.3 시놀로지의 비밀번호 입력
비밀번호 입력 상황이 화면에 표시되지 않습니다. 정상적으로 입력되고 있으니 입력하시고 엔터를 누르시면 됩니다.
C:\Users\ino>ssh navystack@cloud.navystack.com -p 8887 The authenticity of host '[cloud.navystack.com]:8887 ([192.168.0.200]:8887)' can't be established. ECDSA key fingerprint is SHA256:eAqvnXvCXJTTbbfewcqKSHTAgWf9jcgEBm6RIkPw77s. Are you sure you want to continue connecting (yes/no/[fingerprint])? yes Warning: Permanently added '[cloud.navystack.com]:8887,[192.168.0.200]:8887' (ECDSA) to the list of known hosts. navystack@cloud.navystack.com's password: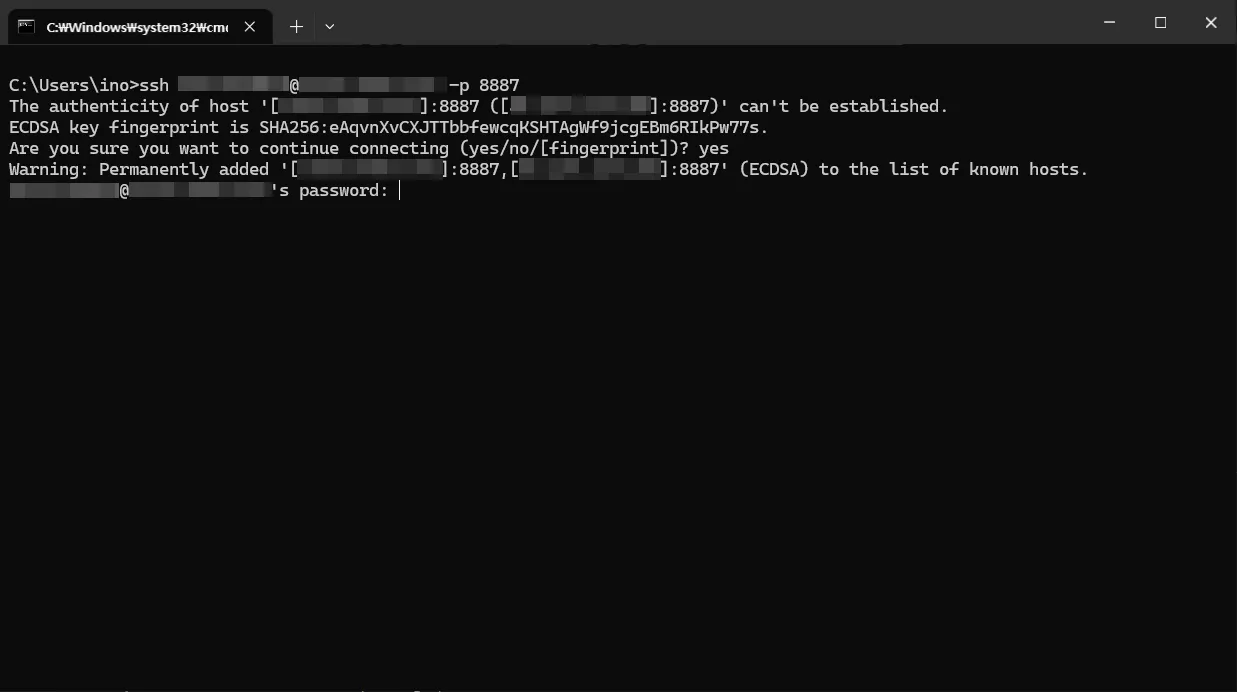
4.4 시놀로지 SSH 접속 확인
  C:\Users\ino>ssh navystack@cloud.navystack.com -p 8887  The authenticity of host '[cloud.navystack.com]:8887 ([192.168.0.200]:8887)' can't be established.  ECDSA key fingerprint is SHA256:eAqvnXvCXJTTbbfewcqKSHTAgWf9jcgEBm6RIkPw77s.  Are you sure you want to continue connecting (yes/no/[fingerprint])? yes  Warning: Permanently added '[cloud.navystack.com]:8887,[192.168.0.200]:8887' (ECDSA) to the list of known hosts.  navystack@cloud.navystack.com's password:
  Using terminal commands to modify system configs, execute external binary  files, add files, or install unauthorized third-party apps may lead to system  damages or unexpected behavior, or cause data loss. Make sure you are aware of  the consequences of each command and proceed at your own risk.
  Warning: Data should only be stored in shared folders. Data stored elsewhere  may be deleted when the system is updated/restarted.
  navystack@Synology:~$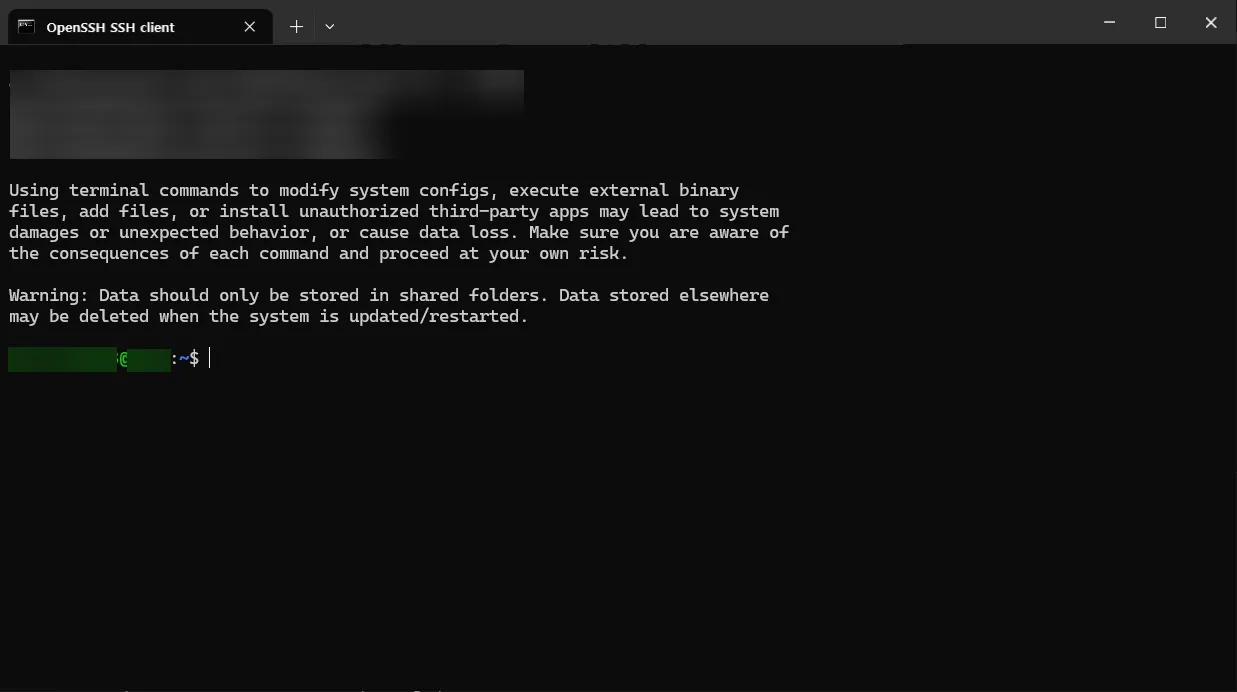
4.5 시놀로지 SU 권한으로 변경
비밀번호 입력 상황이 화면에 표시되지 않습니다. 정상적으로 입력되고 있으니 입력하시고 엔터를 누르시면 됩니다.
  C:\Users\ino>ssh navystack@cloud.navystack.com -p 8887  The authenticity of host '[cloud.navystack.com]:8887 ([192.168.0.200]:8887)' can't be established.  ECDSA key fingerprint is SHA256:eAqvnXvCXJTTbbfewcqKSHTAgWf9jcgEBm6RIkPw77s.  Are you sure you want to continue connecting (yes/no/[fingerprint])? yes  Warning: Permanently added '[cloud.navystack.com]:8887,[192.168.0.200]:8887' (ECDSA) to the list of known hosts.  navystack@cloud.navystack.com's password:
  Using terminal commands to modify system configs, execute external binary  files, add files, or install unauthorized third-party apps may lead to system  damages or unexpected behavior, or cause data loss. Make sure you are aware of  the consequences of each command and proceed at your own risk.
  Warning: Data should only be stored in shared folders. Data stored elsewhere  may be deleted when the system is updated/restarted.
  navystack@Synology:~$ sudo su  Password:  ash-4.4#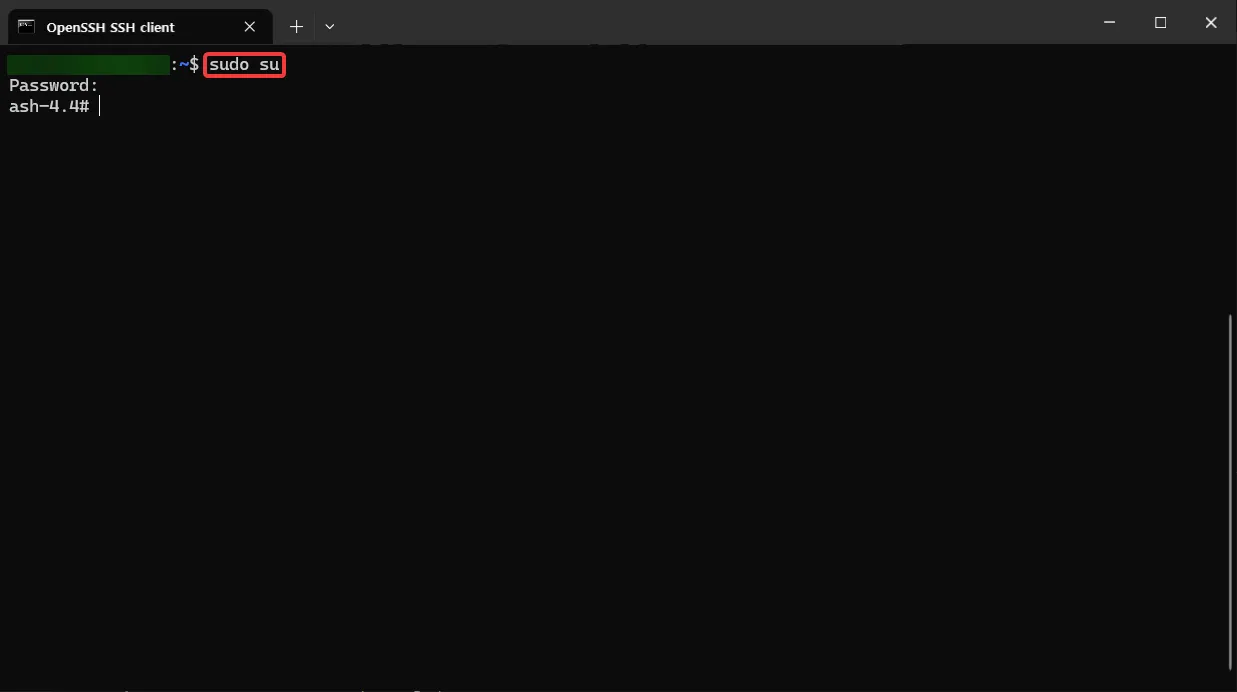
4.6 SSH 접속에서 오류가 나는 경우
경로(본인의 윈도우 계정명에 맞게 수정해서)에서 known_hosts 파일 삭제 후 다시 시도
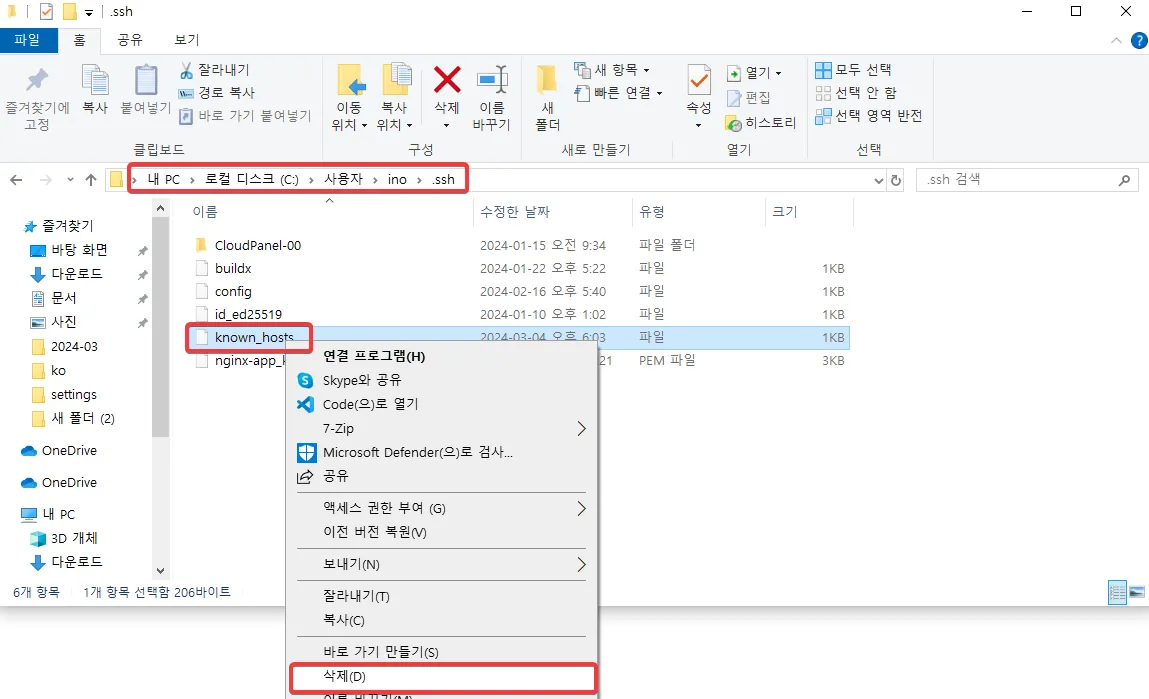
C:\Users\ino\.ssh
C:\Users\내 PC 에서 Users 폴더를 여시면 느낌이 옵니다.
5. 본격적인 acme.sh 설치
꼼꼼히 따라하셨다면 아래와 같이 터미널이 구성됩니다.
ash-4.4#5.1 cd ~ 입력
cd ~5.2 wget으로 다운로드
wget https://github.com/acmesh-official/acme.sh/archive/master.tar.gz5.3 tar으로 압축해제
tar xvf master.tar.gz정상적으로 진행 중이라면 아래와 같이 로그가 뜹니다.
ash-4.4# tar xvf master.tar.gzacme.sh-master/acme.sh-master/acme.shacme.sh-master/deploy/haproxy.shacme.sh-master/deploy/keychain.shacme.sh-master/deploy/kong.shacme.sh-master/deploy/lighttpd.shacme.sh-master/deploy/mailcow.shacme.sh-master/deploy/myapi.shacme.sh-master/deploy/mydevil.shacme.sh-master/deploy/mysqld.shacme.sh-master/deploy/nginx.shacme.sh-master/deploy/openmediavault.shacme.sh-master/deploy/opensshd.sh[하략]5.4 압축 해제한 경로로 이동
cd acme.sh-master/5.4 acme.sh로 설치
--install인수는 설치 하라는 뜻 입니다.--nocron인수는 시놀로지에서 사용자 지정 스크립트를 사용하기 위해 크론 작업을 하지 말라는 의미입니다.--home인수는 기본 홈 디렉토리를 설정하는 인수입니다./usr/local/share/acme.sh로 설정합니다.--accountemail는 이메일을 설정하는 인수로admin@example.com로 설정합니다.
따라서 본인의 이메일로 변경하셔야 합니다.
./acme.sh --install --nocron --home /usr/local/share/acme.sh --accountemail "admin@example.com"정상적으로 진행 중이라면 아래와 같이 로그가 뜹니다.
ash-4.4# ./acme.sh --install --nocron --home /usr/local/share/acme.sh --accountemail "admin@example.com"[Mon Mar 4 07:02:34 PM KST 2024] It is recommended to install socat first.[Mon Mar 4 07:02:34 PM KST 2024] We use socat for standalone server if you use standalone mode.[Mon Mar 4 07:02:34 PM KST 2024] If you don't use standalone mode, just ignore this warning.[Mon Mar 4 07:02:34 PM KST 2024] Installing to /usr/local/share/acme.sh[Mon Mar 4 07:02:34 PM KST 2024] Installed to /usr/local/share/acme.sh/acme.sh[Mon Mar 4 07:02:34 PM KST 2024] Installing alias to '/root/.profile'[Mon Mar 4 07:02:34 PM KST 2024] OK, Close and reopen your terminal to start using acme.sh[Mon Mar 4 07:02:34 PM KST 2024] Good, bash is found, so change the shebang to use bash as preferred.[Mon Mar 4 07:02:36 PM KST 2024] OK5.5 profile적용
source ~/.profile6. DNS 구성
CloudFlare의 경우, DNS 레코드를 설정하기 위해 acme.sh(특히 dnsapi 하위 디렉터리의 dns_cf 스크립트)가 읽을 두 개의 환경 변수를 설정해야 합니다.
다른 DNS API의 경우에는 공식 문서를 참고하세요. 큰 틀은 같습니다.
6.1 API Tokens (권장)
6.2 Global API Key (보안상 취약)
7. 와일드 카드 인증서 생성하기
이제 인증서를 생성할 시간입니다.
7.1 스크립트 경로로 이동 (중요!)
cd /usr/local/share/acme.sh//usr/local/share/acme.sh/의 폴더 경로로 이동해줍니다.
8. 인증서 CA 선택하기
이제 모든 준비는 끝났습니다. 우리는 무료 CA중에서 원하는 CA를 선택하면 됩니다.
방법은 비슷하지만, 구글 인증서 서비스 (Google Trust Services)의 경우에는 GCP의 프로젝트가 필요합니다.
8.1 인증서 발급하기 (letsencrypt)
기본 구조는 아래와 같습니다.
./acme.sh --set-default-ca --server letsencrypt ./acme.sh --issue \ --server letsencrypt \ --home . \ -d navystack.com \ -d *.navystack.com \ --dns "dns_cf"navystack.com은 기본적으로 발급할 인증서입니다.*.navystack.com부분은 우리가 원하는 와일드카드 인증서입니다.
정상적으로 진행되면 아래와 같이 로그가 뜹니다. 일부 정보는 가렸습니다.
ash-4.4# export CF_Token="teYijHYmC05k0LxBVE2gAXIsWkC8ML"ash-4.4# export CF_Email="admin@example.com"ash-4.4# ./acme.sh --issue \> --server letsencrypt \> --home . \> -d navystack.com \> -d *.navystack.com \> --dns "dns_cf"[Mon Mar 4 07:29:14 PM KST 2024] Using CA: https://acme-v02.api.letsencrypt.org/directory[Mon Mar 4 07:29:14 PM KST 2024] Create account key ok.[Mon Mar 4 07:29:14 PM KST 2024] Registering account: https://acme-v02.api.letsencrypt.org/directory[Mon Mar 4 07:29:16 PM KST 2024] Registered[Mon Mar 4 07:29:16 PM KST 2024] ACCOUNT_THUMBPRINT='juX3O5JkWYQhkDV3MJBcUCbD9YURjc'[Mon Mar 4 07:29:16 PM KST 2024] Creating domain key[Mon Mar 4 07:29:16 PM KST 2024] The domain key is here: ./navystack.com_ecc/navystack.com.key[Mon Mar 4 07:29:16 PM KST 2024] Multi domain='DNS:navystack.com,DNS:*.navystack.com'[Mon Mar 4 07:29:19 PM KST 2024] Getting webroot for domain='navystack.com'[Mon Mar 4 07:29:19 PM KST 2024] Getting webroot for domain='*.navystack.com'[Mon Mar 4 07:29:19 PM KST 2024] Adding txt value: rPLmiPOUurIVus6LXUBAwoTLGAi8Zh for domain: _acme-challenge.navystack.com[Mon Mar 4 07:29:20 PM KST 2024] Adding record[Mon Mar 4 07:29:21 PM KST 2024] Added, OK[Mon Mar 4 07:29:21 PM KST 2024] The txt record is added: Success.[Mon Mar 4 07:29:21 PM KST 2024] Adding txt value: iQQYKuBdCFVcFUuaxQ5Gy0VFu2ZVKb for domain: _acme-challenge.navystack.com[Mon Mar 4 07:29:22 PM KST 2024] Adding record[Mon Mar 4 07:29:23 PM KST 2024] Added, OK[Mon Mar 4 07:29:23 PM KST 2024] The txt record is added: Success.[Mon Mar 4 07:29:23 PM KST 2024] Let's check each DNS record now. Sleep 20 seconds first.[Mon Mar 4 07:29:44 PM KST 2024] You can use '--dnssleep' to disable public dns checks.[Mon Mar 4 07:29:44 PM KST 2024] See: https://github.com/acmesh-official/acme.sh/wiki/dnscheck[Mon Mar 4 07:29:44 PM KST 2024] Checking navystack.com for _acme-challenge.navystack.com[Mon Mar 4 07:29:44 PM KST 2024] Domain navystack.com '_acme-challenge.navystack.com' success.[Mon Mar 4 07:29:44 PM KST 2024] Checking navystack.com for _acme-challenge.navystack.com[Mon Mar 4 07:29:45 PM KST 2024] Domain navystack.com '_acme-challenge.navystack.com' success.[Mon Mar 4 07:29:45 PM KST 2024] All success, let's return[Mon Mar 4 07:29:45 PM KST 2024] Verifying: navystack.com[Mon Mar 4 07:29:46 PM KST 2024] Pending, The CA is processing your order, please just wait. (1/30)[Mon Mar 4 07:29:49 PM KST 2024] Success[Mon Mar 4 07:29:49 PM KST 2024] Verifying: *.navystack.com[Mon Mar 4 07:29:50 PM KST 2024] Pending, The CA is processing your order, please just wait. (1/30)[Mon Mar 4 07:29:54 PM KST 2024] Success[Mon Mar 4 07:29:54 PM KST 2024] Removing DNS records.[Mon Mar 4 07:29:54 PM KST 2024] Removing txt: ljhRXfbutMTAqYo82CH0SylwXx3oDA for domain: _acme-challenge.navystack.com[Mon Mar 4 07:29:56 PM KST 2024] Removed: Success[Mon Mar 4 07:29:56 PM KST 2024] Removing txt: vrozqttp4tKoHwGjtCYwwjSyNW2Vkw for domain: _acme-challenge.navystack.com[Mon Mar 4 07:29:58 PM KST 2024] Removed: Success[Mon Mar 4 07:29:58 PM KST 2024] Verify finished, start to sign.[Mon Mar 4 07:29:58 PM KST 2024] Lets finalize the order.[Mon Mar 4 07:29:58 PM KST 2024] Le_OrderFinalize='https://acme-v02.api.letsencrypt.org/acme/finalize/hzoNOnebvOFN4vD8V6z7PhCTed93c2/hzoNOnebvOFN4vD8V6z7PhCTed93c2'[Mon Mar 4 07:30:00 PM KST 2024] Downloading cert.[Mon Mar 4 07:30:00 PM KST 2024] Le_LinkCert='https://acme-v02.api.letsencrypt.org/acme/cert/m5XCIhnxcUJ4DFarHIc3qxWx5aMBFG'[Mon Mar 4 07:30:01 PM KST 2024] Cert success.-----BEGIN CERTIFICATE-----소중한 나의 인증서 정보-----END CERTIFICATE-----[Mon Mar 4 07:30:01 PM KST 2024] Your cert is in: ./navystack.com_ecc/navystack.com.cer[Mon Mar 4 07:30:01 PM KST 2024] Your cert key is in: ./navystack.com_ecc/navystack.com.key[Mon Mar 4 07:30:01 PM KST 2024] The intermediate CA cert is in: ./navystack.com_ecc/ca.cer[Mon Mar 4 07:30:01 PM KST 2024] And the full chain certs is there: ./navystack.com_ecc/fullchain.cer8.2 인증서 발급하기 (Google Trust Services)
letsencrypt 선택하셨다면 하지 않으셔도 됩니다.
기본 구조는 아래와 같습니다. (CLI/GUI 공통)
- services enable publicca.googleapis.com 활성화
- publicca external-account-keys 발급
8.2.1 (CGP 프로젝트로 이동)
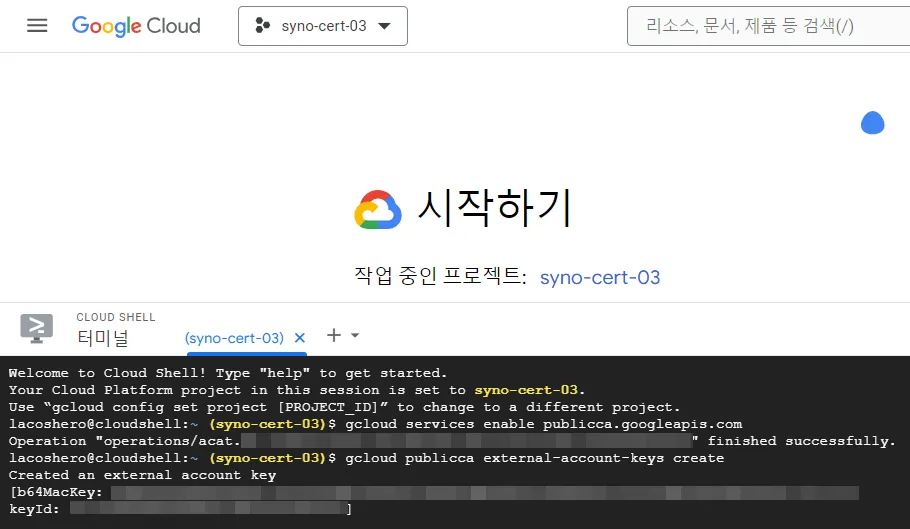
gcloud services enable publicca.googleapis.compublicca.googleapis.com 서비스 활성화
gcloud publicca external-account-keys createexternal-account-keys 키 생성
  Welcome to Cloud Shell! Type "help" to get started.  Your Cloud Platform project in this session is set to syno-cert-03.  Use “gcloud config set project [PROJECT_ID]” to change to a different project.
  navystack@cloudshell:~ (syno-cert-03)$ gcloud services enable publicca.googleapis.com  Operation "operations/acat.p2-fVjbwMhzzsr0Mjq4kSXUAIO8TI5IgK" finished successfully.  navystack@cloudshell:~ (syno-cert-03)$ gcloud publicca external-account-keys create
Created an external account key [b64MacKey: aJoZm2k1jzDEftUF7tuS8yTBaheVCBjuKgwjfrup1YRuAdveOcMlGJ9E22ZhjuKgwjfrup1YRuAdveOcMlGJ9E22Zh keyId: 0HQBjrqTZdMwEVaO45VzWAG6B3Kkdy]./acme.sh --register-account -m admin@example.com --server google \ --eab-kid 0HQBjrqTZdMwEVaO45VzWAG6B3Kkdy \ --eab-hmac-key aJoZm2k1jzDEftUF7tuS8yTBaheVCBjuKgwjfrup1YRuAdveOcMlGJ9E22ZhjuKgwjfrup1YRuAdveOcMlGJ9E22Zh8.2.3 (CGP 프로젝트로 이동)
/usr/local/share/acme.sh/acme.sh --set-default-ca --server google ./acme.sh --issue \ --server google \ --home . \ -d navystack.com \ -d *.navystack.com \ --dns "dns_cf"navystack.com은 기본적으로 발급할 인증서입니다.*.navystack.com부분은 우리가 원하는 와일드카드 인증서입니다.
9. 시놀로지 기본 인증서로 설정
9.1 임시 또는 기존 관리자 사용자로 배포 (추천)
export SYNO_USE_TEMP_ADMIN=1./acme.sh --deploy --home . -d "navystack.com" --deploy-hook synology_dsm --debug 2와일드 카드를 발급하셨더라도 하나의 도메인만 입력하시면 됩니다. (보통 첫번째 줄)
ash-4.4# ./acme.sh --deploy --home . -d "navystack.com" --deploy-hook synology_dsm[Mon Mar 4 07:34:31 PM KST 2024] The domain 'navystack.com' seems to have a ECC cert already, lets use ecc cert.[Mon Mar 4 07:34:32 PM KST 2024] Logging into localhost:5000[Mon Mar 4 07:34:35 PM KST 2024] Getting certificates in Synology DSM[Mon Mar 4 07:34:35 PM KST 2024] Generate form POST request[Mon Mar 4 07:34:35 PM KST 2024] Upload certificate to the Synology DSM[Mon Mar 4 07:34:59 PM KST 2024] Restarting HTTP services succeeded[Mon Mar 4 07:35:02 PM KST 2024] Success9.2 기존 관리자 사용자로 배포
export SYNO_USERNAME='관리자아이디'export SYNO_PASSWORD='관리자-비밀번호'./acme.sh --deploy --home . -d "navystack.com" --deploy-hook synology_dsm --debug 29.3 기존 관리자 사용자로 배포
export SYNO_USERNAME='관리자아이디'export SYNO_PASSWORD='관리자-비밀번호'./acme.sh --deploy --home . -d "navystack.com" --deploy-hook synology_dsm --debug 210. 기본 인증서 확인하기
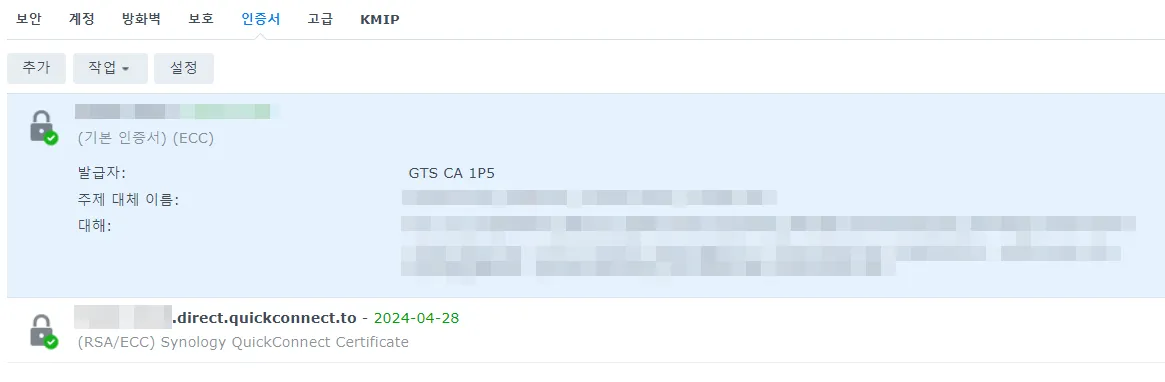
정상적으로 진행되었다면 위와 같이 기본 인증서로 변경됩니다.
와일드 카드 인증서로 발급했으니, 신경을 쓸게 줄었네요 :)
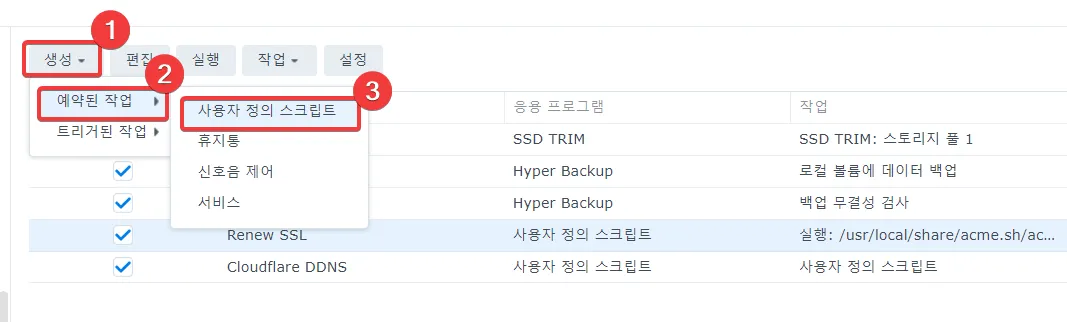
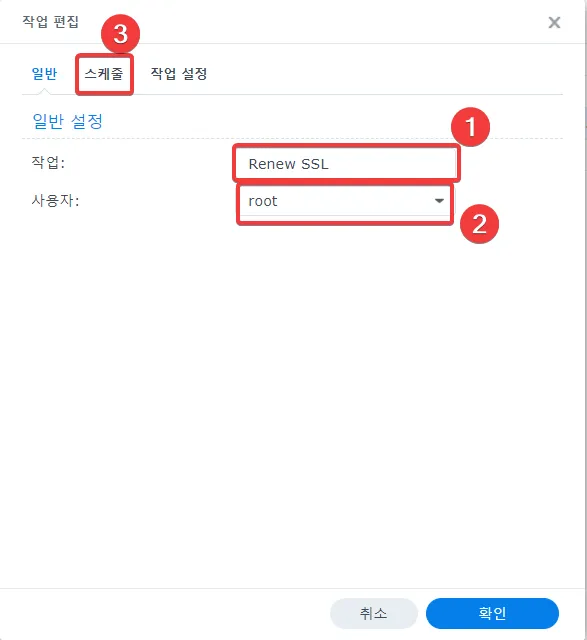
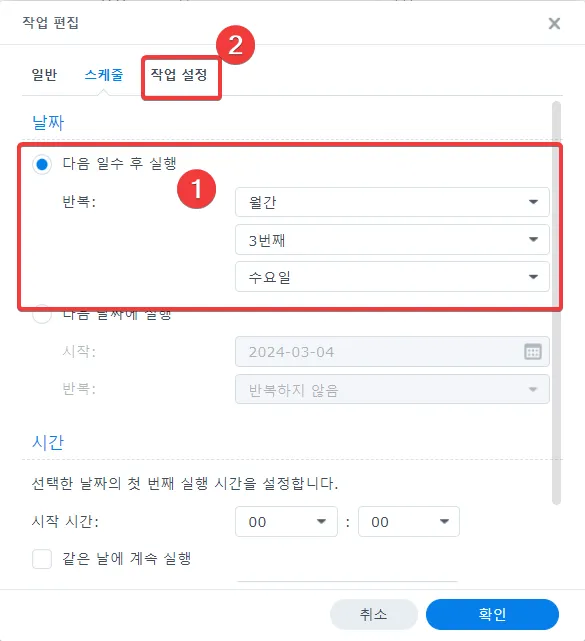
(번외) 사용자 정의 스크립트 (인증서 배포 자동화)
9.1 임시 또는 기존 관리자 사용자로 배포 (추천)로 하셨다면
1. 구글의 경우
#!/bin/bash
## SPDX-License-Identifier: MIT
# 변수 설정ACME_HOME="/usr/local/share/acme.sh"ACME_SERVER="google"DNS_PROVIDER="dns_cf"DOMAIN="navystack.com"
# SSL 인증서 갱신 및 로그 출력log_output=$($ACME_HOME/acme.sh --cron --home $ACME_HOME --server $ACME_SERVER --dns "$DNS_PROVIDER")
# 다음 갱신 시간 파싱next_renewal_time=$(echo "$log_output" | grep -oP 'Next renewal time is: \K[^ ]+')next_renewal_time_kst=$(date -d "$next_renewal_time" +%Y-%m-%dT%H:%M:%S)
# 갱신할 필요가 없는 경우if ! echo "$log_output" | grep -q "to force to renew"; then    echo "$log_output"else    # 인증서 갱신 생략    echo "인증서 갱신을 생략합니다."    echo "갱신 가능 시간은 한국 기준 $next_renewal_time_kst 입니다."    echo "따라서, 인증서 배포를 생략합니다."    exit 0fi
# 인증서 배포deploy_output=$($ACME_HOME/acme.sh --deploy --home $ACME_HOME -d "$DOMAIN" --deploy-hook synology_dsm --server $ACME_SERVER)
# 배포 중 오류 처리if [ $? -ne 0 ]; then    echo "인증서 배포 중에 오류가 발생했습니다:"    echo "$deploy_output"    exit 1fi
echo "인증서 배포가 완료되었습니다."
2. letsencrypt의 경우
#!/bin/bash
## SPDX-License-Identifier: MIT
# 변수 설정ACME_HOME="/usr/local/share/acme.sh"ACME_SERVER="letsencrypt"DNS_PROVIDER="dns_cf"DOMAIN="navystack.com"
# SSL 인증서 갱신 및 로그 출력log_output=$($ACME_HOME/acme.sh --cron --home $ACME_HOME --server $ACME_SERVER --dns "$DNS_PROVIDER")
# 다음 갱신 시간 파싱next_renewal_time=$(echo "$log_output" | grep -oP 'Next renewal time is: \K[^ ]+')next_renewal_time_kst=$(date -d "$next_renewal_time" +%Y-%m-%dT%H:%M:%S)
# 갱신할 필요가 없는 경우if ! echo "$log_output" | grep -q "to force to renew"; then    echo "$log_output"else    # 인증서 갱신 생략    echo "인증서 갱신을 생략합니다."    echo "갱신 가능 시간은 한국 기준 $next_renewal_time_kst 입니다."    echo "따라서, 인증서 배포를 생략합니다."    exit 0fi
# 인증서 배포deploy_output=$($ACME_HOME/acme.sh --deploy --home $ACME_HOME -d "$DOMAIN" --deploy-hook synology_dsm --server $ACME_SERVER)
# 배포 중 오류 처리if [ $? -ne 0 ]; then    echo "인증서 배포 중에 오류가 발생했습니다:"    echo "$deploy_output"    exit 1fi
echo "인증서 배포가 완료되었습니다."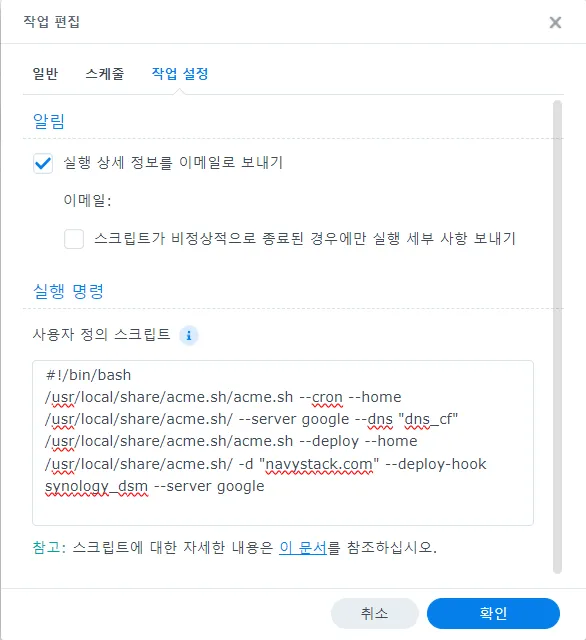
혹시 이메일 설정 안하셨나요? 한 번 해보세요 바로가기
혹시 클라우드플레어 DDNS를 여러개 등록하는 것에 관심이 있으신가요? 한 번 같이 해보실래요? 바로가기
수고 많으셨습니다. 감사합니다.
Askfront.com (에스크프론트)
에스크프론트에서는 NavyStack 가이드뿐만 아니라, 궁금한 모든 질문을 환영합니다. 😊